Posted 8/06/2018
5 Steps To Adding A Custom Domain To Github Pages
Content
Introduction
This guide is to simplify the process of setting up a personal, customized website domain using Google Domains and GitHub Pages.
Setup in Github Repository
Step 1: Creating a GitHub Repository
Let’s start with your Github Repository. If you don’t have a repository started, head to this link to create with the name USERNAME.github.io. In the picture example, I’m using my personal github.io.

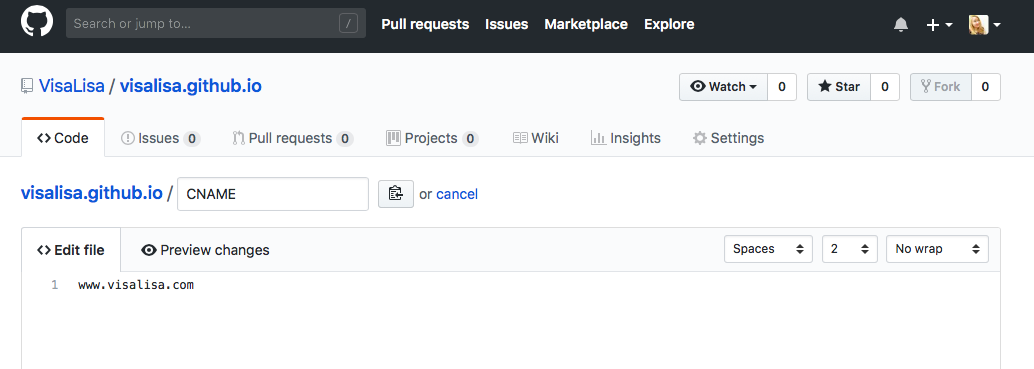
Step 2: Adding CNAME file
In your new repository, create a CNAME file in the root directory and add the following to the file: www.YOUR-WEBSITE-NAME.com
By doing this, we add the domain name in the CNAME file to specify and redirect any request to USERNAME.github.io
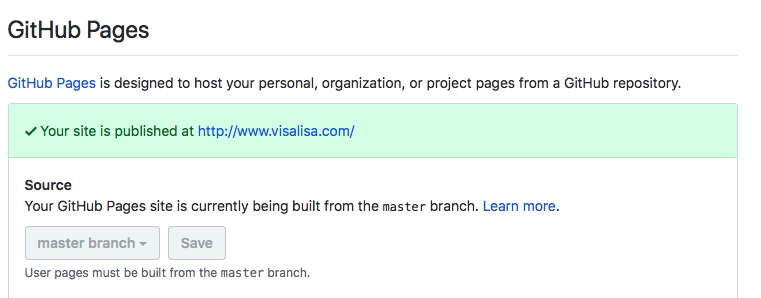
Step 3: Verify Settings
Now verify that USERNAME.github.io is directing to www.YOUR-WEBSITE-NAME.com.
Head to repository’s the ‘Setting’ page > Under ‘GitHub Pages’, your site should be published at “www.YOUR-WEBSITE-NAME.com.”
Configuring the Google Domain
Step 4: Configure Google Domains
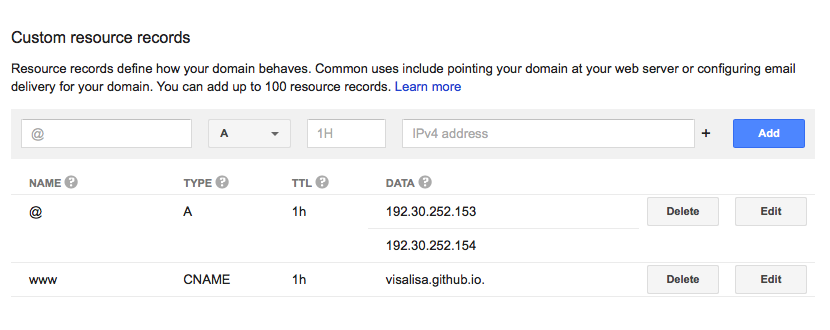
Let’s get your custom domain from Google. Head to ‘My Domains’ and select the DNS button to configure your DNS record.

Go to the ‘Custom Resource Records’ section. You will be adding a following:
| Name | Type | TTL | Data |
|---|---|---|---|
| @ | A | 1h | 192.30.252.153 |
| 192.30.252.154 | |||
| www | CNAME | 1h | USERNAME.github.io |
Step 5: We’re Done
It should look like this when you’re done.
Conclusion
Now we're done! The DNS records can sometime take more than 24 hour to display your website, so you may not see it immediately. In the time being, adding new pages to your Github website should be accessible from your new domain.
To test the page, I would use to see if your DNS record has come through:
    www.USERNAME.github.io
    www.YOUR-WEBSITE-NAME.com
    www.USERNAME.github.io/about
    www.YOUR-WEBSITE-NAME.com/about